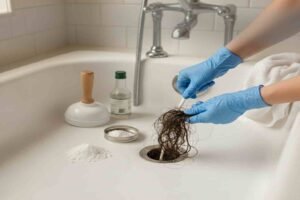
Repair a leaky faucet easily with simple DIY hacks Do you hate dripping of the faucet? If yes, then you are at the right place. A leaky faucet at home is one of the most annoying things; it is so small, and yet so big that you cannot see it, but it is so huge that it is ruining your comfort. It may make you rise in the middle of the night, maybe you do feel a pang of conscience whenever you hear water dripping or maybe you are just fed up with the drip that just is that keeps reminding you that something is wrong. However, the broken leaky faucet is not as hard to repair as most individuals think. You need not be a plumber or possess any tools; you need not even get a full remodelling of a bathroom. Likewise, it is repairable and with little knowledge like expert plumbers and patience can save on your water bill, as well, because you can repair it yourself. 1. Knowing the Reason Why Faucets Leak It is always prudent to know the reasons why the faucets are leaking before visiting the toolbox. You can also read more about how a faucet works here. The leaks are the most frequent as they are caused by the internal components that are located inside the faucet i.e. washers, O-rings or cartridges being worn out as the days pass by. As people go through the faucet, these parts weaken slowly, loosen and even crack, leading to drops of water leaking out even when the tap is well closed. A leaky faucet may also be caused by hard water deposits, water pressure and outdated hardware. With a sense of the reason behind it, the solution becomes far less terrifying. 2. Turning Off the Water Supply The first step towards every successful repair is a simple yet important step of turning off the water. Check under your sinks where the little pipes where the hot and cold water are operated are. Turn clockwise to turn off. This can be done to make sure that you do not have to contend with sudden sprays or floods during work. Then switch on the tap and flush out the remaining water in the pipe. This cleanses the pipes and leaves a dry and safe working area. 3. Breaking Down the Faucet When the water has been turned off, the faucet is now to be dismantled. You need not worry, this section is easier than it sounds. The screw that fits the handle is covered by a cap or some decoration on most faucets. Use a flat tool to gently lift the cap off, and then you have to remove the screw and lift off the handle. Indoors, there will be more screws and inner mechanisms depending on the type of faucet- compression, cartridge, ball, or ceramic-disk. Take your time, and see how all things go together, and put all the little bits together, so that nothing will get lost. 4. Malfunctioning Components Check-Up Check the rubber washers, identify older wear and tear, broken O-rings, or a broken cartridge. These are the suspects of the common irritant drip. In case of brittle, stiff or loose parts, they probably require replacement. In the case of the cartridge or ceramic-disk faucets, the whole cartridge might require replacement. This is all in finding out who the culprit is in order to know specifically what to replace. 5. Replacing the Faulty Parts Afterwards, there comes the gratifying aspect, which is the addition of new-fresh parts. Whether it is a spare part or a new part, it is cheap and readily accessible in hardware shops. In case you do not know what to purchase, you can just bring the old one along and match it. After the right parts are in hand, put them into their right positions just as the original ones were fitted. Hold all the parts firmly though not excessively; otherwise, injury will ensue. These new elements will seal the faucet effectively, hence avoiding leakage and is a clear flow of water. 6. How to Clean the Inside of the Faucet Remove the time to wash the internal parts of the faucet before putting it back. The hard water mineral deposits usually accumulate within it, interfering with movement and sealing. These deposits can be relaxed by adding white vinegar to the components, and the faucet will be functioning like new. Wipe all the stuff using a soft cloth in order to remove dirt or film. The inside of the faucet must be clean and this will assist in preventing future leakages and also performance. 7. Reassembling the Faucet Once everything has been washed changed the broken ones, you are now ready to begin building the faucet in the same order as it was brought down. Rebuild the cartridge, washers, screws and handle. Make sure that there are no floating bits. When the handle has been secured, replace the decorative cap. It is time now to begin to feel the faucet growing smooth and hard. 8. Checking the Faucet for Leaks When the water passes out in a smooth manner with no leakage when you use the handle, which is not hard, you have done the faucet well. With a drip, loosen up the parts and tighten them once more or check once more that the new component is in the right position. Most of the leaks are evaporated right after proper replacement, according to professional personnel. Conclusion It is not only fixing a leaky faucet to eliminate an irritating drip, but to find some form of comfort, save water, safeguard your home against possible destruction and a sense of DIY accomplishment. A little patienc,e and this easy step-by-step guide will enable you to cope with the job easily without invoking the services of a plumber. When you hear that irritating drip again, you will not have to put up with it or live with it, you will know what to